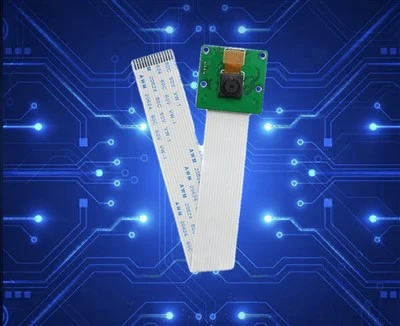
As a supplier of ESP32 Camera Module, I often receive inquiries from customers on how to install the ESP32 Camera Module library in Arduino. This process is crucial for those who want to utilize the full potential of our ESP32 Camera Module in their projects. In this blog post, I’ll provide a detailed guide on the installation procedure, along with some troubleshooting tips. ESP32 Camera Module
Prerequisites
Before you begin installing the ESP32 Camera Module library, there are a few things you need to have in place.
- Arduino IDE: You need to have the Arduino Integrated Development Environment (IDE) installed on your computer. If you haven’t installed it yet, you can download it from the official Arduino website. The Arduino IDE is a cross – platform application that allows you to write and upload code to Arduino boards and compatible devices like the ESP32 Camera Module.
- ESP32 Board Support: The Arduino IDE needs to have support for ESP32 boards. You can add ESP32 board support by going to
File > Preferencesin the Arduino IDE. In the"Additional Boards Manager URLs"field, add the following URL:https://dl.espressif.com/dl/package_esp32_index.json. Then go toTools > Board > Boards Manager, search for "esp32" and install the ESP32 platform by Espressif Systems. - ESP32 Camera Module: Of course, you need to have our ESP32 Camera Module. It comes with a range of features such as high – resolution image capture, Wi – Fi connectivity, and more, making it suitable for various applications like security cameras, environmental monitoring with image capture, etc.
Step – by – Step Installation of the ESP32 Camera Module Library
Step 1: Obtain the Library
There are two common ways to get the ESP32 Camera Module library.
- Using the Arduino IDE Library Manager: Open the Arduino IDE. Navigate to
Sketch > Include Library > Manage Libraries. In the Library Manager window, type "esp32 – camera" in the search bar. Look for the "esp32 – camera" library in the search results. Select the latest stable version and click the "Install" button. This method is convenient as the IDE takes care of downloading and managing the library files for you. - Manual Installation: If you prefer to install the library manually, you can go to the official ESP32 Camera Module GitHub repository. Download the library as a ZIP file. In the Arduino IDE, go to
Sketch > Include Library > Add.ZIP Library. Select the downloaded ZIP file, and the Arduino IDE will extract and install the library in the correct location.
Step 2: Verify the Installation
After the library is installed, you can verify its installation by creating a simple test sketch.
- Open a New Sketch: In the Arduino IDE, go to
File > Newto open a new sketch. - Include the Library: At the top of the new sketch, add the following line of code to include the ESP32 Camera Module library:
#include "esp_camera.h"
- Check for Compilation Errors: Click the "Verify" button (the checkmark icon) in the Arduino IDE toolbar. If there are no compilation errors, it means the library is installed correctly. If you encounter errors, it could be due to issues such as incorrect library installation paths or conflicts with other libraries.
Step 3: Configure the Board
Before you can use the ESP32 Camera Module, you need to configure your board settings in the Arduino IDE.
- Select the Board: Go to
Tools > Boardand select "ESP32 Wrover Module" (this is the most common board type for the ESP32 Camera Module). You can also select other compatible ESP32 board types depending on your specific module. - Select the Port: Go to
Tools > Portand select the serial port to which your ESP32 Camera Module is connected. You may need to check your device manager (on Windows) or system information (on Mac) to find the correct port.
Troubleshooting Common Installation Issues
Library Not Found
If you get an error saying that the ESP32 Camera Module library was not found during compilation, try the following:
- Re – install the Library: If you installed the library using the Library Manager, uninstall it and reinstall it. If you installed it manually, delete the library folder from the Arduino libraries directory and re – add the ZIP file.
- Check the Library Name: Make sure you are including the library with the correct name in your sketch. The correct name to include is
esp_camera.h.
Compilation Errors Related to Board Settings
If you encounter compilation errors related to board settings, such as "undefined reference to setup" or "undefined reference to loop", check the following:
- Board Selection: Ensure that you have selected the correct ESP32 board type in the
Tools > Boardmenu. Different ESP32 boards may have slightly different configurations, and selecting the wrong board can lead to compilation errors. - Flash Size and Partition Scheme: Go to
Tools > Flash SizeandTools > Partition Schemeand select the appropriate settings for your ESP32 Camera Module. The default settings may not work for all modules.
Using the ESP32 Camera Module after Installation
Once you have successfully installed the library and configured your board, you can start using the ESP32 Camera Module in your projects. Here is a simple example of a sketch that initializes the camera and captures an image:
#include "esp_camera.h"

// Camera configuration
camera_config_t config;

void setup() {
  Serial.begin(115200);

  // Camera settings
  config.ledc_channel = LEDC_CHANNEL_0;
  config.ledc_timer = LEDC_TIMER_0;
  config.pin_d0 = Y2_GPIO_NUM;
  config.pin_d1 = Y3_GPIO_NUM;
  config.pin_d2 = Y4_GPIO_NUM;
  config.pin_d3 = Y5_GPIO_NUM;
  config.pin_d4 = Y6_GPIO_NUM;
  config.pin_d5 = Y7_GPIO_NUM;
  config.pin_d6 = Y8_GPIO_NUM;
  config.pin_d7 = Y9_GPIO_NUM;
  config.pin_xclk = XCLK_GPIO_NUM;
  config.pin_pclk = PCLK_GPIO_NUM;
  config.pin_vsync = VSYNC_GPIO_NUM;
  config.pin_href = HREF_GPIO_NUM;
  config.pin_sscb_sda = SIOD_GPIO_NUM;
  config.pin_sscb_scl = SIOC_GPIO_NUM;
  config.pin_pwdn = PWDN_GPIO_NUM;
  config.pin_reset = RESET_GPIO_NUM;
  config.xclk_freq_hz = 20000000;
  config.pixel_format = PIXFORMAT_JPEG;
  //init with high specs to pre-allocate larger buffers
  if(psramFound()){
    config.frame_size = FRAMESIZE_UXGA;
    config.jpeg_quality = 10;
    config.fb_count = 2;
  } else {
    config.frame_size = FRAMESIZE_SVGA;
    config.jpeg_quality = 12;
    config.fb_count = 1;
  }
  // Camera init
  esp_err_t err = esp_camera_init(&config);
  if (err != ESP_OK) {
    Serial.printf("Camera init failed with error 0x%x", err);
    return;
  }
}

void loop() {
  camera_fb_t * fb = NULL;
  fb = esp_camera_fb_get();
  if (!fb) {
    Serial.println("Camera capture failed");
    return;
  }
  // Here you can process the image data
  // For example, you can send the image over Wi-Fi
  esp_camera_fb_return(fb);
  delay(5000);
}
Conclusion
Installing the ESP32 Camera Module library in Arduino is an essential step for anyone looking to work with our ESP32 Camera Module. By following the steps outlined in this guide, you should be able to install the library successfully, troubleshoot any issues that arise, and start developing your own projects.
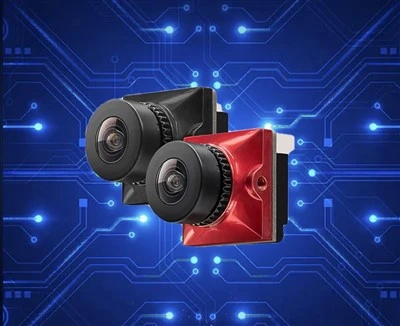
Camera Module for Drone If you are interested in purchasing our high – quality ESP32 Camera Modules for your projects, we invite you to contact us for more details and to discuss your specific requirements. Our team of experts is always ready to provide you with the best solutions and support.
References
- Espressif Systems documentation on ESP32 Camera
- Arduino official documentation on Library installation and board support
Shenzhen Juchangxing Technology Co., Ltd.
We are one of the most experienced esp32 camera module manufacturers and suppliers in China, also support custom service. We warmly welcome you to wholesale durable esp32 camera module at competitive price from our factory. If you have any enquiry about cooperation, please feel free to email us.
Address: 3rd Floor, Build A, No. 8, Huangdiyin IndustrialZone, Longhua District, Shenzhen.
E-mail: sales@juchangxing.com
WebSite: https://www.jcxcamera.com/
