Hey there! I’m from a gear pump supplier team, and today I wanna chat about the repair methods for a gear pump. As someone deeply involved in the industry, I’ve seen my fair share of gear pump issues and know how crucial it is to get them fixed right. Gear Pump
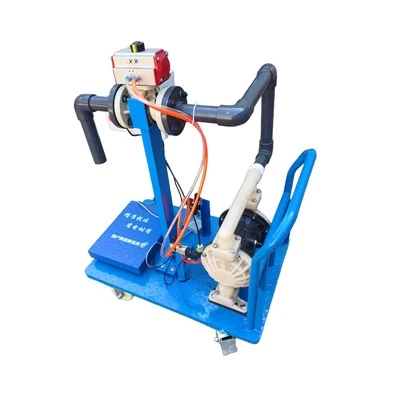
Let’s start with the basics. A gear pump is a pretty simple yet effective device. It uses two or more gears to transfer fluid by displacement. When they break down, it can disrupt all sorts of operations, from industrial processes to hydraulic systems and even some automotive applications. So, here are the common repair methods we usually deal with.
Identifying the Problem
Before you start any repair work, you’ve got to figure out what’s wrong with the gear pump. This involves a thorough inspection. I usually start by looking at the pump externally. Check for any obvious signs of damage like leaks, cracks, or loose connections. A leak can be a clear sign of seal failure or a cracked housing. You can often spot leaks by looking for oil stains around the pump or a drop in the fluid level in the reservoir.
Next, listen to the pump when it’s running. An unusual noise, like a high – pitched whining or a grinding sound, can indicate problems. A whining noise might mean there’s air in the system, while a grinding sound could be a sign of worn gears or bearings.
If possible, check the pressure and flow rate. Low pressure or inconsistent flow can point to issues within the pump, such as gear wear, a clogged suction line, or a faulty relief valve. And don’t forget to check the temperature of the pump during operation. Overheating can be a symptom of friction due to misaligned gears or insufficient lubrication.
Fixing Seal Leaks
Seal leaks are one of the most common problems with gear pumps. There are two main types of seals: shaft seals and housing seals. When a shaft seal fails, you’ll usually see fluid leaking around the pump shaft. To fix this, you’ll need to remove the old seal. Most shaft seals are held in place by a retaining ring or through a press – fit. Use the right tools, like a seal puller, to carefully remove the old seal without damaging the shaft or the housing.
Before installing the new seal, clean the area thoroughly. Make sure there’s no dirt or debris that could cause the new seal to fail prematurely. Apply a small amount of lubricant to the new seal to help it slide into place easily. Then, press the new seal firmly into position using a seal installer or a suitable socket.
For housing seals, it’s a bit more involved. You may need to disassemble the pump to access the housing seal. Remove all the bolts holding the pump housing together. Once you’ve got the housing apart, remove the old seal. Clean the mating surfaces of the housing to ensure a good seal. Then, install the new housing seal. Make sure it’s properly aligned and seated, and reassemble the pump tightly.
Addressing Gear Wear
Gears are the heart of a gear pump, and over time, they can wear out. You can tell if the gears are worn by a decrease in pump performance, like lower pressure and flow. When inspecting the gears, look for signs of uneven wear, scoring, or chipping.
If the wear is minor, you might be able to polish the gears to smooth out the rough surfaces. Use a fine – grit sandpaper or a polishing stone. Make sure to keep the surface as flat as possible to maintain proper gear meshing. But if the gear teeth are severely worn or damaged, you’ll likely need to replace them.
Replacing gears requires some precision work. First, remove the old gears. This may involve taking apart the pump’s bearing housing and other components. Make sure to keep track of all the parts and their orientation. When installing the new gears, ensure that they are properly aligned and meshed. Check the gear clearance using a feeler gauge. The correct gear clearance is crucial for the pump to operate efficiently.
Bearing Replacement
Bearing problems can also cause a lot of headaches with gear pumps. Worn bearings can lead to increased vibration, noise, and premature gear wear. To check the bearings, you can try to move the shaft radially and axially. If there’s excessive play, it’s a sign that the bearings need replacing.
To replace the bearings, remove the pump housing and any components that are obstructing access to the bearings. Use a bearing puller to remove the old bearings. Again, be very careful not to damage the shaft or the housing during this process.
When installing new bearings, make sure they are the correct size and type for your pump. Heat the new bearings slightly (using a bearing heater) to make them easier to install on the shaft. Then, press the bearings onto the shaft using a proper bearing installation tool. After installation, check the shaft’s rotation to ensure it’s smooth and free of any binding.
Solving Suction and Discharge Issues
Sometimes, the problem isn’t with the pump itself but with the suction or discharge lines. A clogged suction line can prevent the pump from drawing in fluid properly. This can be caused by debris, dirt, or a partially closed valve. To fix this, first, shut off the pump and relieve the pressure in the system. Then, remove the suction line and clean it thoroughly. You can use a brush or a high – pressure air gun to blow out any debris.
On the discharge side, a blocked or restricted line can cause high pressure in the pump, leading to damage. Check the discharge line for kinks, blockages, or a malfunctioning valve. If there’s a blockage, clear it out. If the valve is faulty, repair or replace it.
Electrical and Control System Checks
In some modern gear pumps, there are electrical components and control systems involved. If the pump isn’t starting or is operating erratically, you need to check these parts. Start by checking the power supply. Make sure the pump is getting the correct voltage and that the wiring is intact.
Inspect the control switches, relays, and sensors. A faulty sensor can send incorrect signals to the pump’s control system, causing it to operate incorrectly. You can use a multimeter to test the electrical components for continuity and proper voltage. If you find a faulty component, replace it with a new one.
Re – assembling and Testing
After you’ve completed all the necessary repairs, it’s time to re – assemble the gear pump. Make sure to follow the reverse order of disassembly. Tighten all the bolts to the correct torque specification. This is important to prevent leaks and ensure proper alignment of the components.
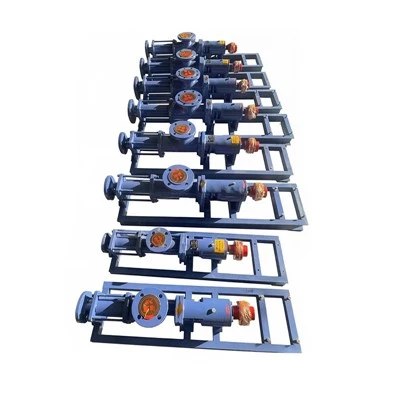
Once the pump is reassembled, it’s crucial to test it. Fill the system with the appropriate fluid and prime the pump. Start the pump and check the pressure and flow rate. Listen for any unusual noises or vibrations. Monitor the temperature of the pump during operation. If everything seems normal, let the pump run for a while to ensure its long – term reliability.
Gear Pump If you’re facing any gear pump issues or are looking to purchase high – quality gear pumps, don’t hesitate to reach out to us. We’ve got the expertise and the products to meet your needs. Whether you need a simple repair or a brand – new pump, we’re here to help. Just contact us to start a purchase negotiation, and we’ll work together to find the best solution for you.
References
- "Hydraulic Pump Handbook"
- "Industrial Pump Maintenance Guide"
- "Gear Pump Technology and Applications"
Botou Hengyang Pump & Valve Co., Ltd.
With abundant experience, we are one of the most professional gear pump manufacturers and suppliers in China. Please feel free to buy high standard gear pump made in China here and get pricelist from our factory. All customized pumps are with high quality and competitive price.
Address: No. 159, Road 1, Development Zone, Botou City, Cangzhou, Hebei Province, China
E-mail: bthdbf@163.com
WebSite: https://www.hyoilp.com/
